Gift Card Envelope Tutorial
Supplies Needed
11cm x 22.5cm piece of cardstock
Scissors, Glue, circle punch, brads scoring tool, and a piece of string

Diagram

Step One
Take out your ruler and pencil and draw the lines on the inside of your cardstock. Then Score those lines. The measurements are seen in the diagram above.

Step Two
Take your scissors and start to cut out the pannels you don't need. As indicated in the diagram above.

Take your scissors and start to cut out the pannels you don't need. As indicated in the diagram above.

Step Three
Use your hole punch to cut out the two tiny circles as indicated in the diagram and as shown below. Punch out your circles and then punch out a hole in the center of them as well.

On what will be the outside of your gift card holder, place the circle on top of the recently punched hole and insert your piece of string so that there is a little hanging out the back. Insert the eyelet and set it. Repeat this step with the second hole, but you will not need a piece of string for that one.

Step Four
Add your glue to each of the side flaps as seen below. Fold the flaps in and then fold the cardstock up so that the flaps adhere to the other side.

The back of your gift card holder should look like this. You close it by wrapping the string underneath the circles.

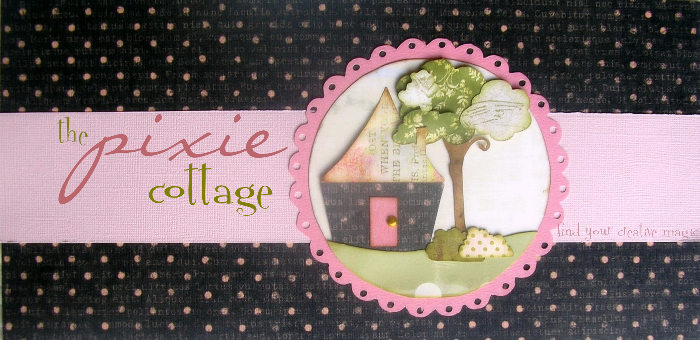
Turn the gift card holder over and decorate the front as you see fit. I just had to use this New adorable "Snow Fairy" Pixie Cottage Stamp from Michelle's Scrapbooking and More. She is just precious!

If you get stuck during this tutorial and need some clarification, by all means, leave a comment as such and I will gladly help you out.
Have a wonderful Saturday, and be sure to join us December 10th, 2011 when Francy will be showcasing another fabulous Pixie Cottage Saturday Tutorial.
Hugs,
Tanya R
Hi Ladies, I wanted to put the conversion in for centimeters to inches for all the American crafters. 1 inch is equal to 2.54 centimenters. You can also check your child's ruler, as there usually is the metric system on one side.-----Michelle


4 comments:
Hi Tanya this tutorial is gorgeous and very simply to follow.
Thank you very much.
Francy
Tanya this is wonderful!! I plan on making a few myself, also with a little adjustment to the sizes you can make a holder for lottery tickets. (here is the US.. like to give those out at birthdays, holidays etc) I give a few of those out this time of year too.
If anyone needs the dimensions in inches let me know I can convert it. If I get time later I will come back and add the conversions.
Neat tutorial Tanya~~Thanks so very much!! Gonna give it a try:)
Hugz and blessings
Very handy tutorial for this time of the yr Tanya! I sure will give it a try. Hugz, Steph
Post a Comment