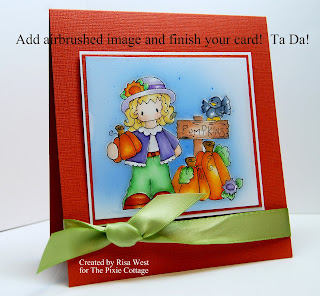
.jpg)
Hello Everyone!
Today, I'm going to give you a picture tutorial on how I airbrush my finished images. I started airbrushing my images almost two years ago and started out using cans of compressed air. I loved the results but buying cans of air is a little too expensive for me though. I saved my money and brought a small air compressor that I absolutely love!
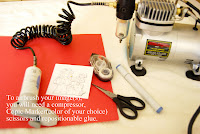.jpg) The supplies that you need are, an air compressor, scissors,repositionable adhesive,scrap paper, Copic Marker and a double of your stamped image.
The supplies that you need are, an air compressor, scissors,repositionable adhesive,scrap paper, Copic Marker and a double of your stamped image. 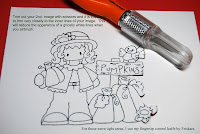.jpg) Using your scissors, trim closely along the inside lines of your image.(a close trim prevents ghost like white shadows when airbrushing) For tight in between areas, I use my Friskars fingertip control knife for cutting.
Using your scissors, trim closely along the inside lines of your image.(a close trim prevents ghost like white shadows when airbrushing) For tight in between areas, I use my Friskars fingertip control knife for cutting.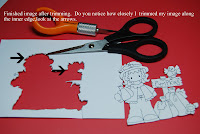.jpg) Notice how much of the inked edges are left on the paper. Click on arrows for a closer look.
Notice how much of the inked edges are left on the paper. Click on arrows for a closer look. 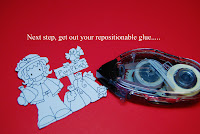.jpg) Get out your repositionable adhesive and apply the adhesive to the backside of your trimmed out image.
Get out your repositionable adhesive and apply the adhesive to the backside of your trimmed out image.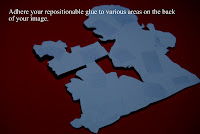.jpg) and then adhere the trimmed image to your colored in image.
and then adhere the trimmed image to your colored in image.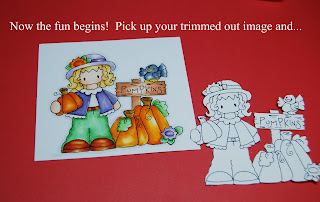.jpg)
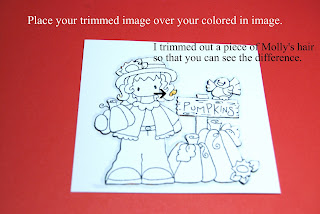.jpg)
Now you are ready to begin airbrushing!
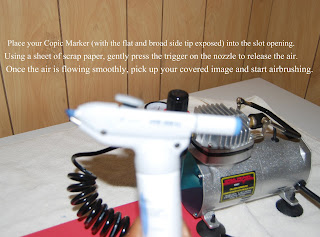.jpg) Insert your Copic Marker with the broad side tip showing into the slot opening on top of the nozzle. Holding a scrap piece of paper in front of the nozzle, pull the trigger and release the air. (you will a noisy type buzzing as the air is being released) Once you are satisfied with the paint flow, pick up your covered image and start to airbrush. For me, the trick is in your wrist, I gently move my wrist around as I airbrush. You also want to make sure that your image isn't too close to the nozzle. If your image is too close, you will get specks of ink on your paper.
Insert your Copic Marker with the broad side tip showing into the slot opening on top of the nozzle. Holding a scrap piece of paper in front of the nozzle, pull the trigger and release the air. (you will a noisy type buzzing as the air is being released) Once you are satisfied with the paint flow, pick up your covered image and start to airbrush. For me, the trick is in your wrist, I gently move my wrist around as I airbrush. You also want to make sure that your image isn't too close to the nozzle. If your image is too close, you will get specks of ink on your paper.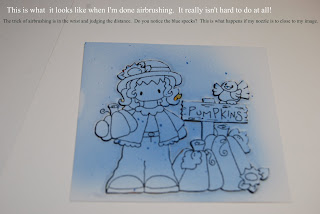.jpg) Finished airbrushed image.
Finished airbrushed image.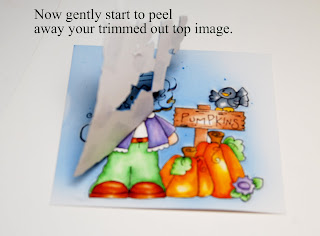.jpg) Gently start to peel away your trimmed out top image.
Gently start to peel away your trimmed out top image.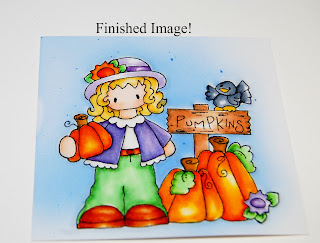.jpg) Finished image! *My image was a little too close to my nozzle and the result is specked dots!
Finished image! *My image was a little too close to my nozzle and the result is specked dots!.jpg) Now all you have to do is make your card! I hope that my tutorial was easy to follow and understand. *Once I have trimmed out an image, I put it away and save it for another card or project.
Now all you have to do is make your card! I hope that my tutorial was easy to follow and understand. *Once I have trimmed out an image, I put it away and save it for another card or project.Thank You!




11 comments:
Excellent tutorial - and a beautiful card!
Its awesome Risa, thanks so much!! I actually like the little specks of blue so I wouldn't worry about it. I'm so glad to see how you all achieve this. Thanks again. :-)
What a beautiful card Risa,I love the image and the colours.
Hugs Riet.xx
Very cool Risa!!! Looks perfect!!
trying again to leave a comment,this is just brilliant hun really love the effect must get an air brush just wanted to know if you can use pro markers,too hugs cheryl xxxx
trying again to leave a comment,this is just brilliant hun really love the effect must get an air brush just wanted to know if you can use pro markers,too hugs cheryl xxxx
How fantastic! Thanks Risa.
Wonderful tutorial Risa! I always love how your background looks on your cards. You make it look so easy :)
Great tutorial Risa!
Wonderful tutorial Risa!!
Fabulous tutorial Risa!! Make a wonderful even looking background!
Post a Comment